Podcast: Play in new window | Download ()
Subscribe: Apple Podcasts | Spotify | Amazon Music | RSS | More
VMware employees are encouraged to work on pet projects during their spare time. Sometimes, these projects are posted online for the world to enjoy. These projects are called Flings… and they can be found at labs.vmware.com/flings. If you are not too hip to them, you should totally check them out. You may find something really useful in there… which I totally did!
Last week, an announcement was released on Twitter regarding a new Fling from a VMware employee… “PXE Manager for vCenter”! There is something magical about PXE booting/installing that I really like. It just makes things so much simpler. So, when I saw this, my interest was officially piqued. I just had to try it out.
So, I present to you, “VMware Fling — PXE Manager for vCenter — How To Setup And Get Installing” (obviously, I selected the title out of brevity).
First off — a little disclaimer… The instructions found below are meant to be a guide on the concepts and steps for performing the installation and configuration of the PXE Manager for vCenter. You are the master of your environment. I have no idea what is going on and you do. So, read the guide below and adjust, wherever necessary, to fit your environment.
PXE relies heavily on the DHCP protocol. Many environments do not have DHCP in the datacenter. If you do, you will need to learn how to adjust for this environment. Additionally, DHCP operates in the realm of a broadcast domain. Essentially, your server will ‘yell’ on the network for an IP address. So, the PXE Manager server needs to live in the broadcast domain so it can listen for the yells and respond appropriately.
Requirements
- Windows Server 2003 R2, 2008, or 2008 R2
- Microsoft .NET Framework 3.5 SP1
- Microsoft .NET Framework 3.5 SP1 Update KB 959209
- Microosft Visual C++ 2008 SP1 (x64)
This guide was created using Server 2008 R2. Screenshots and feature installation procedures for OS features may vary with the other OS options.
Installing PXE Manager for vCenter
Step 0: Gain access to a Windows server (version from above) that you can install PXE Manager on. (How about a VM?!)
Step 1: Ensure .NET Framework 3.5 SP1 and patch have been installed.
– If you are running Server 2008, you may need to enable the .NET Framework 3.5 SP1 as a feature:
– You can verify .NET Framework has been installed by looking in the %WINDIR%\Microsoft.NET\Framework64 for the v3.0 and v3.5 directories.
Step 1: Download the Fling from http://labs.vmware.com/flings/pxe-manager
Step 2: Extract the files to a known directory
Step 3: Run ‘vgpxe-x64.exe’
– If you do not have the .NET Framework installed correctly, the process will fail here. Go and get it installed buddy!
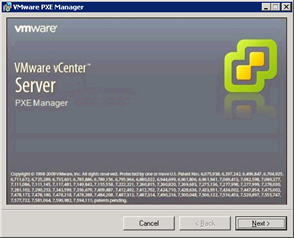
Step 4: Follow the usual installation prompts.
Step 5: At the end of the installation run the PXE Boot Manager process.
Configure PXE Manager for vCenter
The configuration of the PXE Manager services is very straightforward. It is comprised of some service level configuration and some vSphere Client level configuration.
Service Level Installation/Configuration
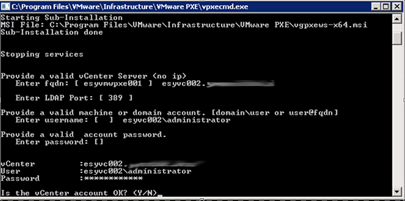
Note: This windows is spawned at the end of the installation process.
Step 0: Provide a fully qualified domain name to your vCenter server.
Step 1: Provide/confirm the LDAP port.
Step 2: Provide a user that can access the vCenter resources on the vCenter server. In the example, we have provided a user that is local to the vCenter host server.
Step 3: Provide a password for the user defined in Step 2.
Step 4: Confirm the information
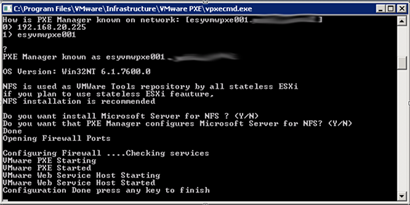
Step 5: The service configuration will configure Windows Firewall values and ask if you would like PXE Manager to install/setup Microsoft Server for NFS. This is used to support the stateless ESXi installations. We are not going to delve into that with this guide, so the answer is ‘N’.
Step 6: The service configuration has been completed. Well done! Time to move onto the vSphere Client plugin configuration
vSphere Client Integration Installation
PXE Manager requires an integration/plugin to be installed into a vSphere Client environment. This, much like other plugins, will load an icon into the Home screen so you can complete the PXE Manager configuration completely and start deploying ESXi hosts.
Step 0: Determine which workstation with the vSphere Client is going to have the plugin installed. This is a client level installation, not a server level installation.
Step 1: Copy the Fling download to the workstation.
Step 2: Run the ‘vPXEClient41.exe” executable
Step 3: Follow the typical installation procedure (next, next, next…).
Step 4: Start the vSphere client and accept/ignore the self signed certificate.
Step 5: Wait about 1-2 minutes. The vPXEClient41.exe executable instructed the vSphere client to connect to the PXE Manager server and get the plugin. Magically, after 1-2 minutes, the plugin will appear.
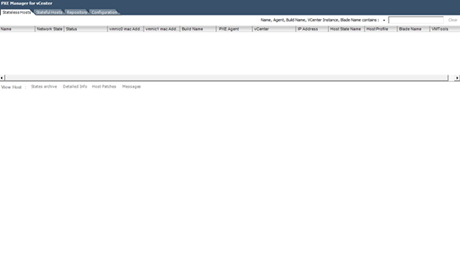
Step 6: Welcome to PXE Manager for vCenter!!! Well done!
PXE Manager for vCenter Configuration
The vSphere Client is where the meat of the configuration happens. There are a number of tasks that need to be accomplished before you can use PXE Manager… and there are a number of concepts you need to be aware of.
Concept 1 — Repository
PXE Manager has the ability to manage multiple installation images. Each image is stored in its own repository. So, you can have a repository for different versions of ESXi if necessary.
Concept 2 — Available Operations
PXE Manager has the ability to perform multiple installation options. These include:
- Stateless Hosts — Hosts that install ESXi to a NFS share and do not require local storage
- Stateful Hosts — Hosts that install to local storage and settings persist on the single host across a reboot.
- VMware Tools — Manage multiple versions of VMware Tools.
- Host Updates — Manage the ability to upload and store multiple update media to be applied to a host. At this time, I am not too sure of the integration between this function and the VMware Update Manager functionality. But, it is there nonetheless.
Configure a Repository
- The first step in getting PXE Manager up and running is to configure the repository. We need to place the installation files somewhere on the PXE Manager server to provide them to the hosts. The PXE Manager client takes care of this for us.
- Step 1: Select the “Stateful Build” inside of the “Repository” tab
 Step 2: Right-click under the “Name” column header and select the “Add Build” option.
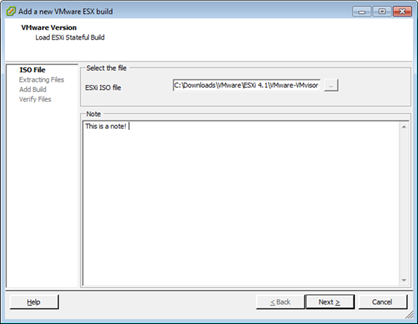
Step 3: Browse to a downloaded ESXi 4.1 ISO that you have stored somewhere.
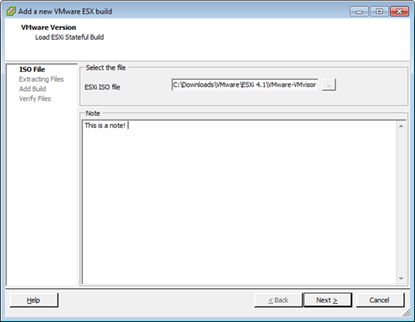
Step 4: Add a note for what the ISO is used for, if necessary. Click Next.
Step 5: This step actually cracks open the .ISO and determines which files are available to use. Click Next.
Step 6: You can define the actual version and build number. This may be useful if you are in an environment where you need to customize the .ISO in order to include some systemic level drivers/functions. However, more often than not, you are just fine leaving the values as default. Click Next.
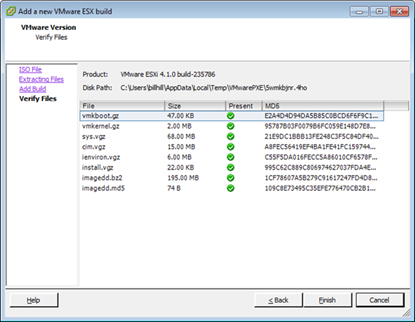
Step 7: PXE Manager will check the files for verify against MD5 checksums (YAY!!! This makes me HAPPY!!!). Click Finish.
Step 8: Now that you have finished creating the repository, PXE Manager plugin is going to actually upload the .ISO files to the PXE Manager server.
Obviously, this is going to take some time depending on where your workstation is in relation to the PXE Manager server. Luckily, we all know that the ESXi installation medium is relatively small.
While the copy process is continuing, take the time for a little break. You have made it this far… time for a breather.
Configure A Host
Now that we have a repository defined and populated, we can define a host that we want to install ESXi on. This is done in the “Stateful Hosts” tab of the PXE Manager client plugin.
Notice how a list of the existing servers in your vCenter environment is shown! This is great because you can utilize that information for reinstallation later. The information that is included about each host includes: configuration, patch levels, host messages, hardware information, etc… However, we are not here to gawk at information about the other hosts. We are more concerned about adding a host that does not exist in the environment. To do that, we need to define a new host.
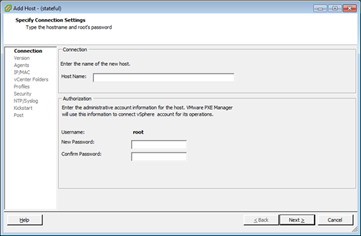
Step 0: Right-click in the list of hosts and select the “Add Host” option.
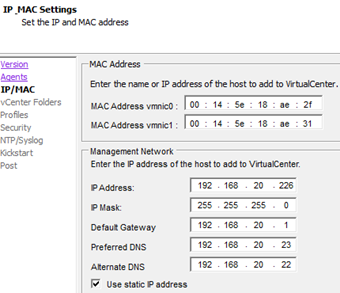
– As you can see from the pane on the left, there are a number of configuration datum we need to provide for a host. The most important is going to be the MAC address.
Step 1: Start filling out the information
- Hostname
- Password for the ‘root’ user
- Version
- Agent
- IP/MAC
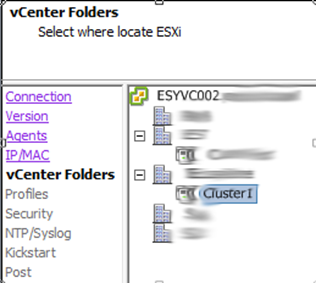
- vCenter Folders
- Profiles
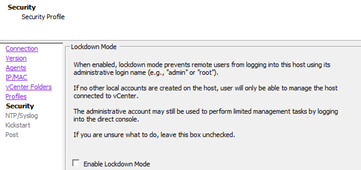
- Security
- NTP/Syslog
- Provide values for NTP Servers and a Syslog server
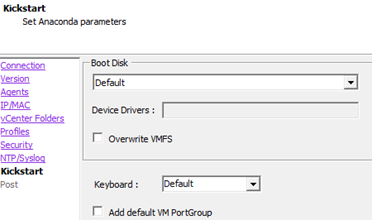
- Kickstart
- Allows you to create a little kickstart customization script to help automate the installation. Options include
- Boot Disk: Which partition do you want to install on
- Overwrite VMFS: Select this option if you want the installer to overwrite any existing VMFS volumes to install upon. This may cause you to lose VMs if you have any other storage attached (local, Fibre LUNs, Hardware iSCSI initiators). BE CAREFUL! You know what you are doing in your environment, not me!!!
- Keyboard: Keyboard language selection
- Add default VM PortGroup: This wil lcreate the default vSwitch Port Group.
- We will take the defaults
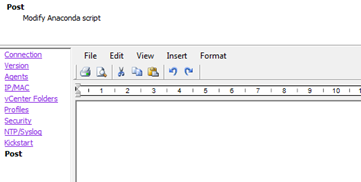
- Post
- You can add custom scripting to be executed during the Post-Installation phase.
- We will leave this blank
- Click Finish.
- Woa… that was a long Step 1. But, it was totally worth it. Now, we have a host defined! Guess what… time for the fireworks… let’s deploy an ESXi host.
Deploying ESXi Host Using PXE Manager
This is the easiest procedure in the entire guide.
Step 0: Turn on the server
Step 1: Instruct the server to boot from the Network
Step 2: Watch as the ESXi installation completes
Conclusion
Deep down, PXE Manager is just a really useful DHCP/PXE environment. The value in being able to PXE install an ESXi installation is really high. The amount of customization that is possible and the sheer speed of pulling over the network just adds to the value.
PXE Manager utilizes the same exact concepts for PXE booting environments:
- DHCP server listening for IP address broadcasts
- DHCP ability to redirect a client to a server for more instructions
- DHCP ability to specify different instructions to different hosts based on MAC addresses
- TFTP server hosting media files to provide the installation bits for the server
I have created posts/guides on this technique before.
However, this is a little different. It is highly specialized for VMware ESXi environments. Configuration is flashy and provided in a client that virtualization administrators are familiar with. Plus, the values you are required to provide ensure that the correct host is being configured (thanks to the MAC address).
I love that this Fling was developed. PXE installation can be a little confusing at times. This simplifies the setup and provides much needed functionality for deploying ESXi environments.
I really hope this makes it out to future VMware vSphere/vCenter products!


